This bender came about in response to a miserable time I had trying to bend some curly English sycamore bindings. Up until this time I had made do with a pipe bender.It was impossible to bend on a pipe so the fox bender I made needed to be based on a full body mould so that it could bend bindings long enough to go around the body in one piece . The LMI blanket that was long enough to do this was 6 inches wide so that set the mould width, but what I’ve ended up with easily bends two soprano sides next to each other at the same time. I’m an electrician with experience in automation and control so building a controller was the next project. Unlike some, this blanket doesn’t have an inbuilt thermocouple so I wanted a way of getting the blanket to 130*C and having the option of removing the separate thermocouple to get it out of the way of the rollers and still maintain the temperature. The controller that I got off EBay had this nice feature of locking the duty cycle once the temperature was established so that the thermocouple could be removed. In practice the controller applies full power to the blanket for about 2 minutes and then starts pulsing the power when the temperature approaches the set point. To maintain the temperature at the set point requires about a 30% duty cycle. When the temperature is stable I switch the controller to manual and remove the thermocouple and it continues ticking away at 30%. I also added a timer function so I can get it to maintain temperature for 6 minutes and then automatically shut down. Handy for that final baking and setting.
The other thing that I came up with based on trial and error was the thickness of the shims and the order of the sandwich. The wood that I developed this system on was mulga which is a very hard and brittle so it is probably overkill for most other stuff but now I have a system that works I’m reluctant to start cutting out bits because breakages are so dispiriting. The bottom of the sandwich is a 0.3mm (0.015”) stainless shim, next are the sides to be bent which are lightly sprayed with water and wrapped in alfoil, next is a 0.3mm stainless shim then the heater blanket, followed by a 0.15mm stainless shim and finally a 3mm sheet of rubberised cork gasket material. My thinking with the cork blanket is that I wanted the heat to be trapped within the sandwich and not radiate outwards. As I said probably overkill. I get the sandwich in order on the bench and get everything to stay put with bulldog clips. I then slide it through the rollers (there are spacers near the springs to hold them out of the way) and under the waist press, insert the 3mm thermocouple between the sides and the blanket and set the temperature controller to work. It takes about 2 minutes to establish the temperature then I leave it for three minutes for the wood to soften.
I initially wind the waist press down half way and then gradually work the front bout roller half the way around to its finished location. I then do the same for the back bout roller and then screw down the waist to about 90%. I then take the front bout around to about 80* and fit the hold down bar as shown in the photo. I then take the roller back to about 45* and repeat the process for the back bout. I finally tighten the waist down, set the timer to 6 minutes and let it bake. The hands on manual bending bit takes about 3 minutes. I leave it for a few hours to cool and then reheat for 6 minutes. I read somewhere this reduces spring back. I let it cool again and then remove the sides and fit them into the body moulds to dry and harden for a few days before gluing in the end blocks and kerfed linings. The last picture is of some highly figured Koa and there isn’t any suggestion of fracturing. I hope this helps anybody thinking of making a fox bender.
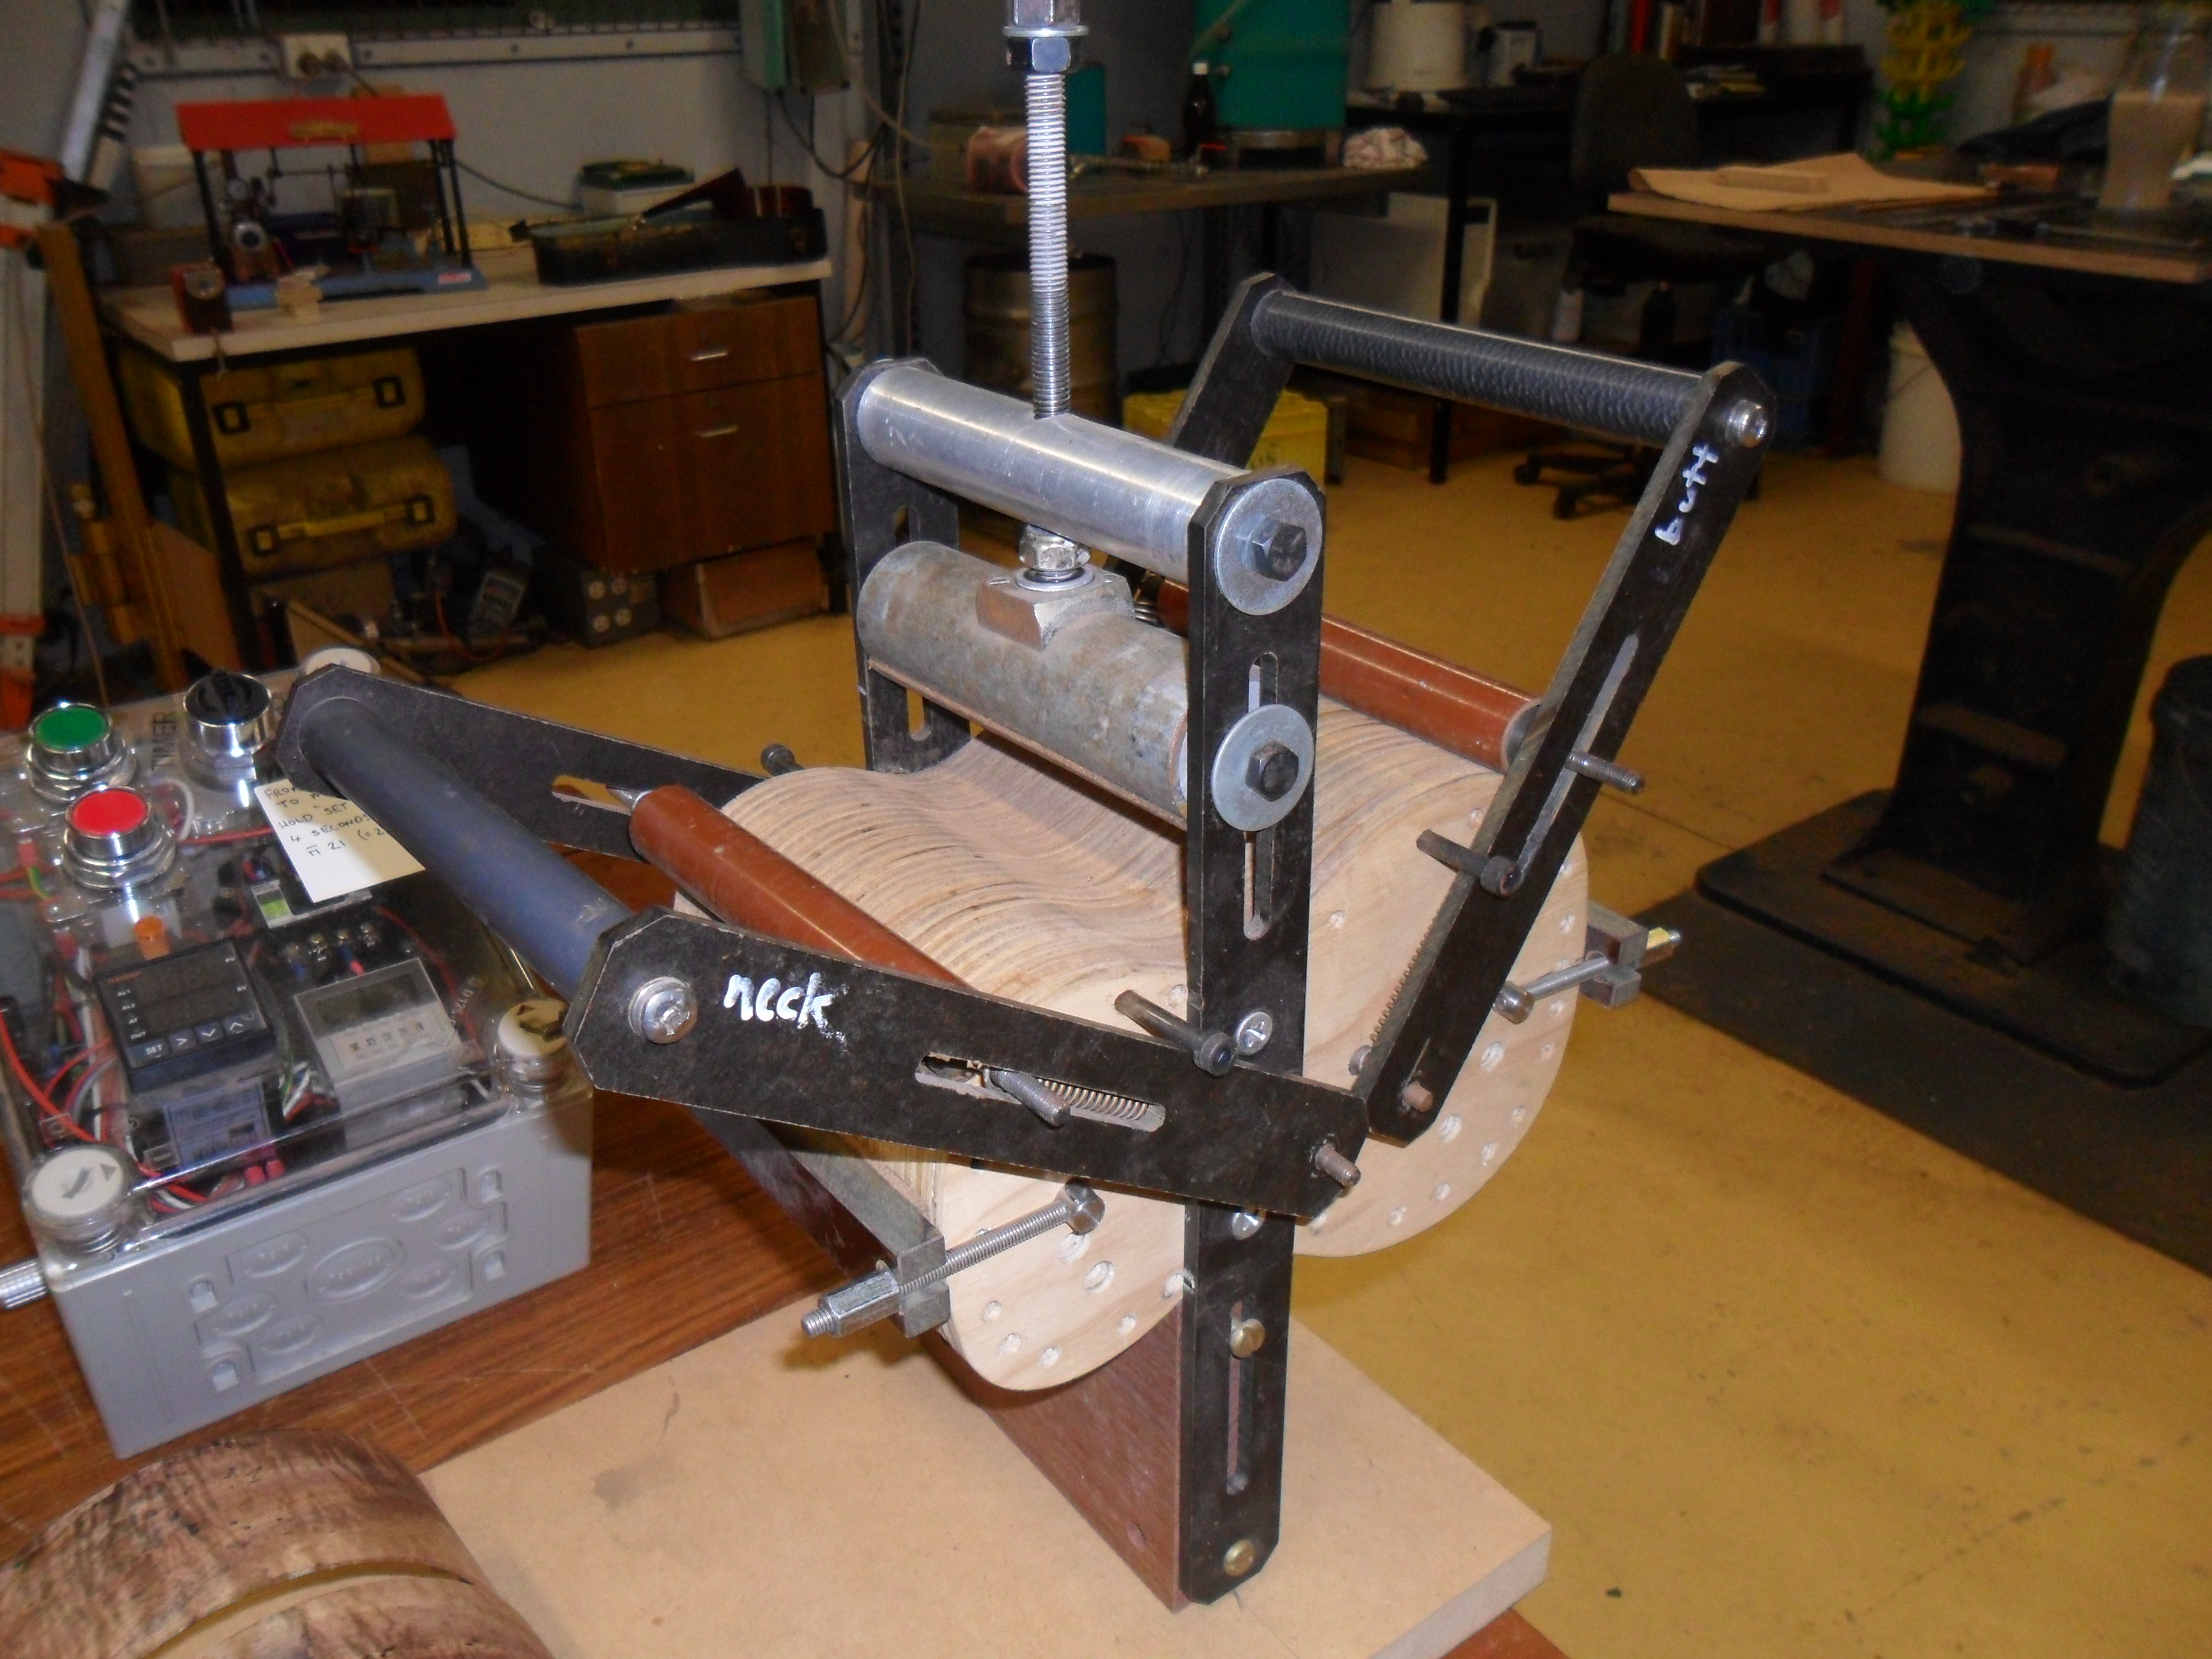
Ready to go

With the shim, wood and heater sandwich in place. The thermocouple is tucked between the leaves for heat up and then removed.

Waist press 1/2 down and the rollers starting to do their job. There are stop pins so I can lock the rollers in one spot and let the wood relax.

All the way around and cooling down
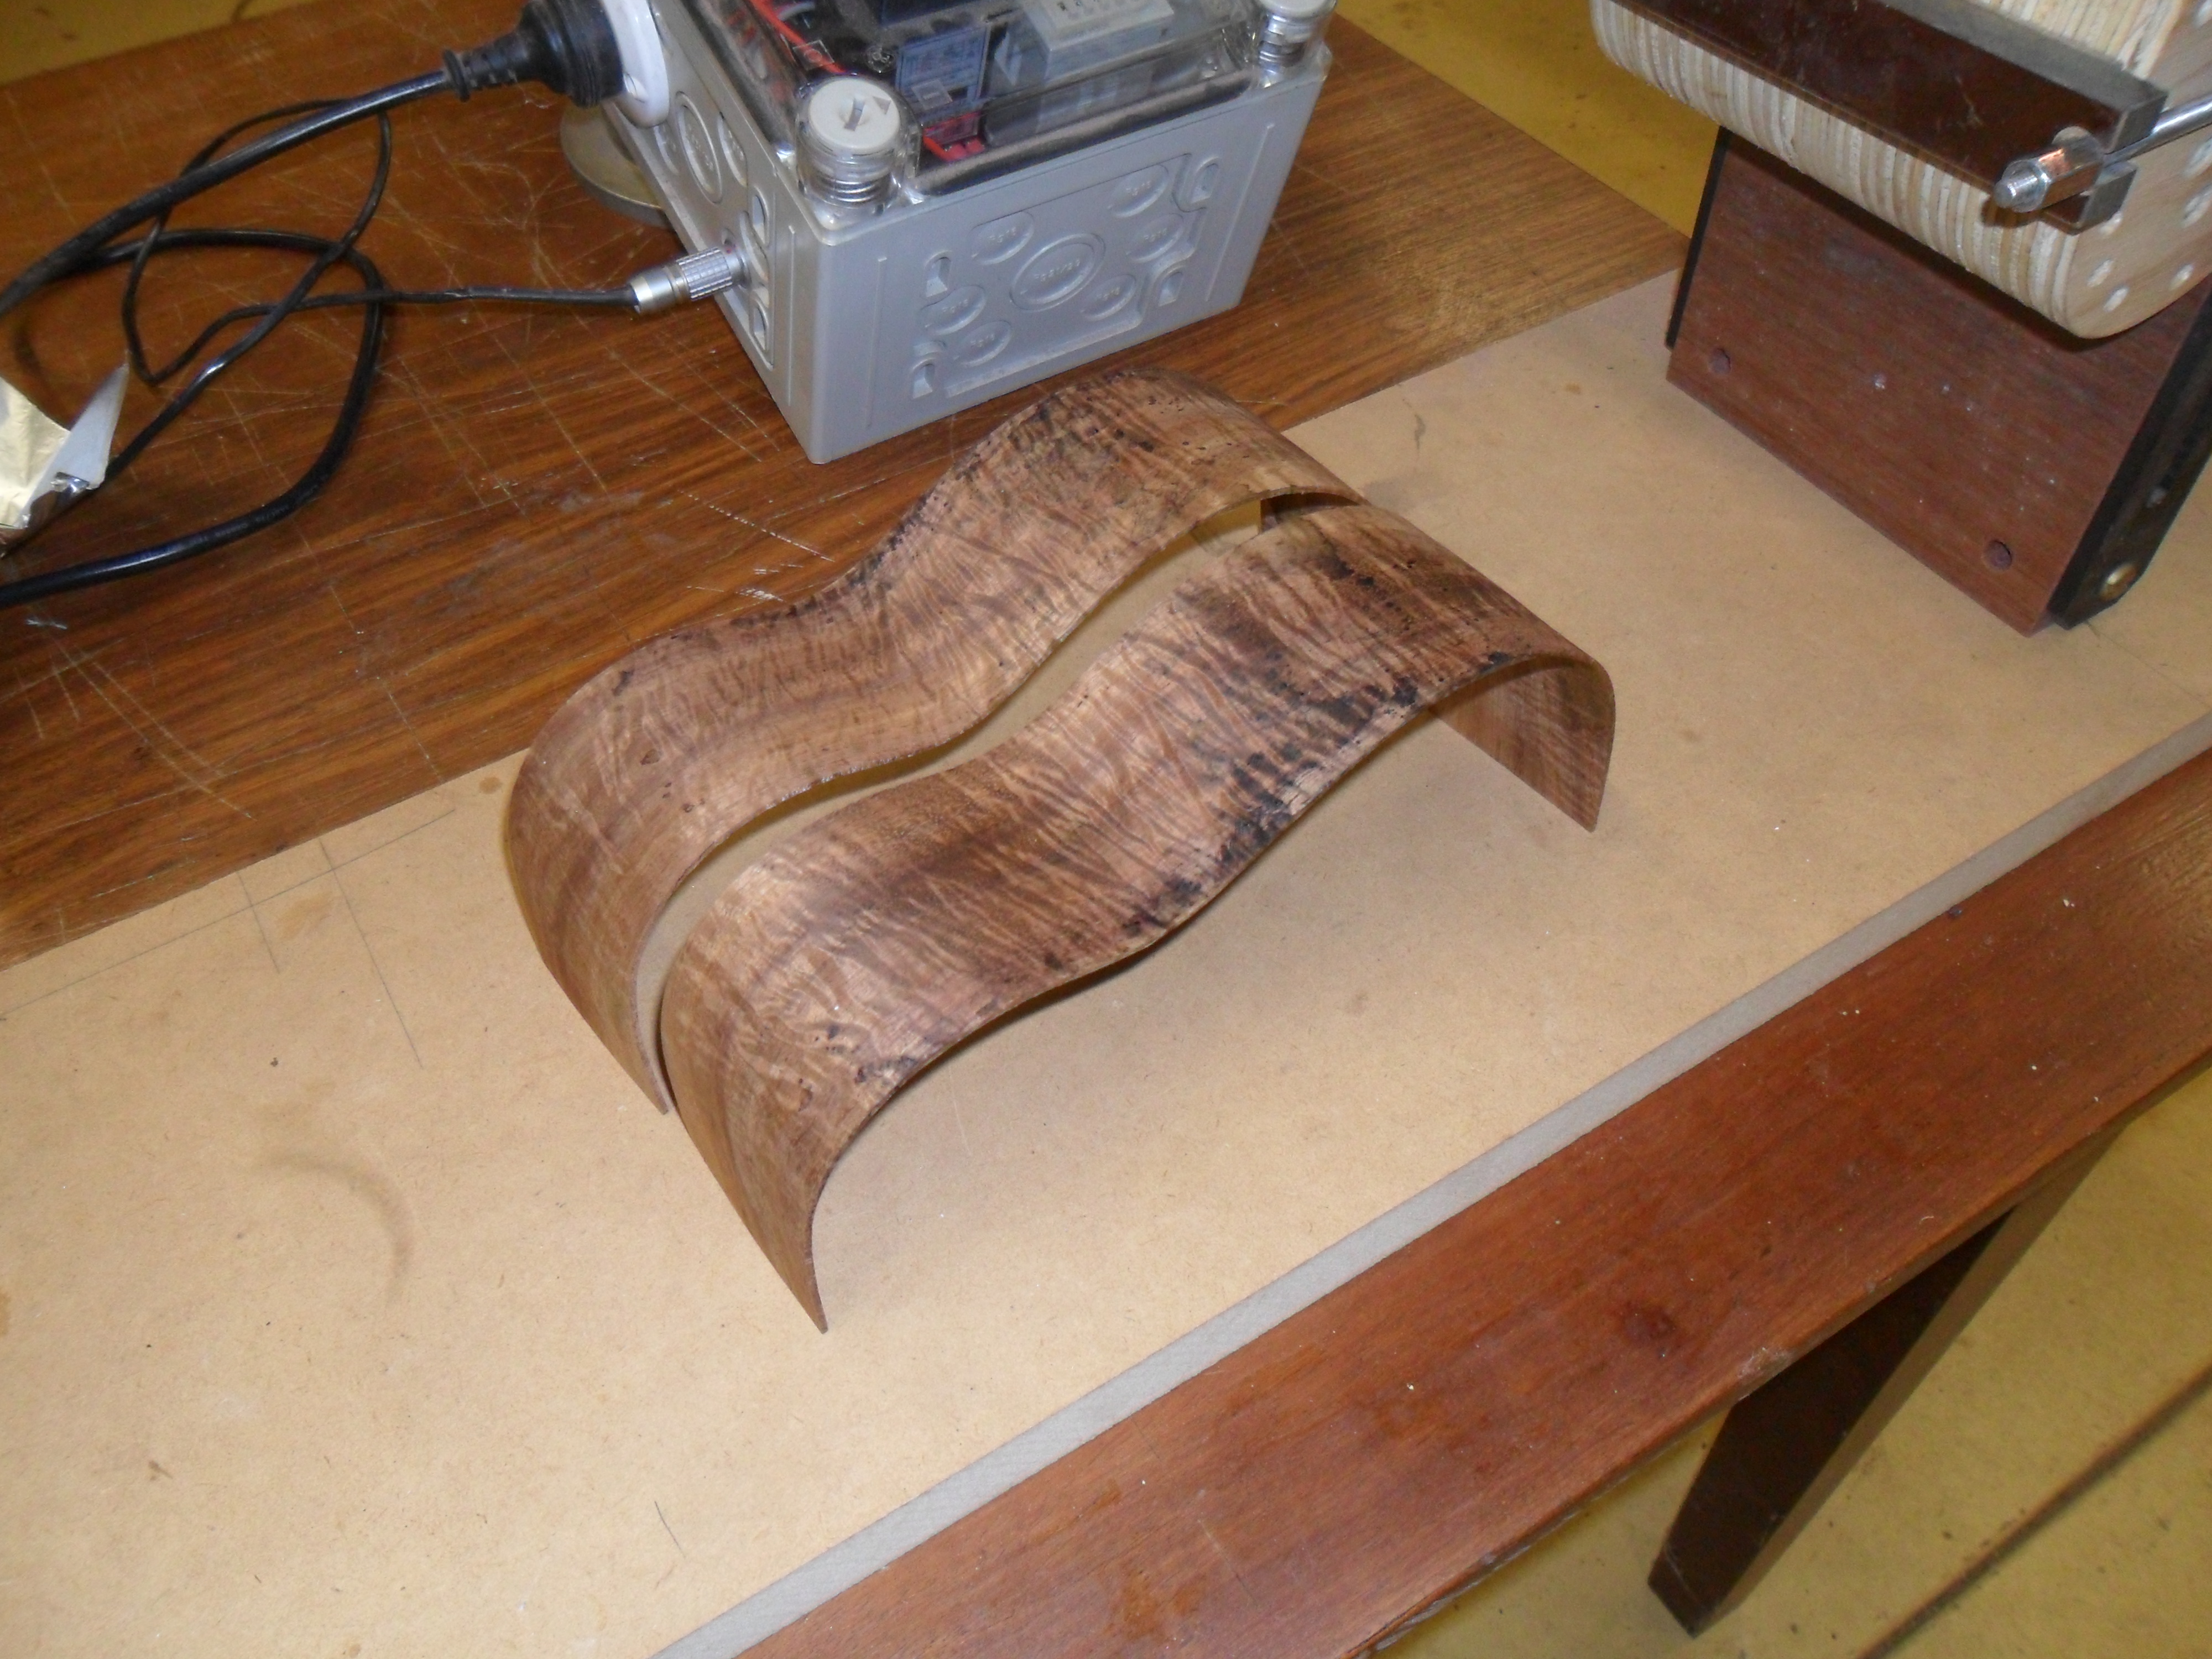
Some delicious curly koa successfully bent

[…] to take any pictures of the bending of these sides but there is a separate tutorial on foxbending here. I attached the end blocks (tutorial here) to the sides and then tapered the nd profiled the hollow […]
LikeLike