Hello again,
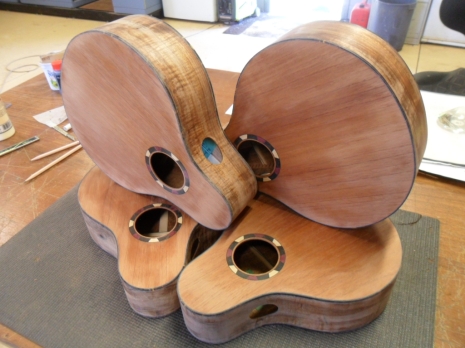
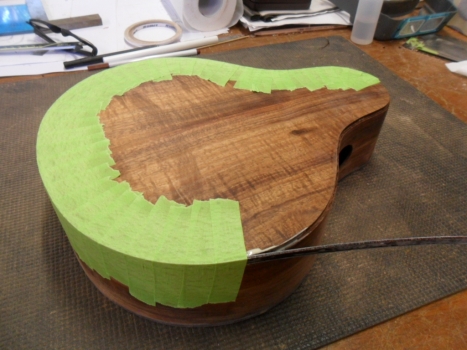
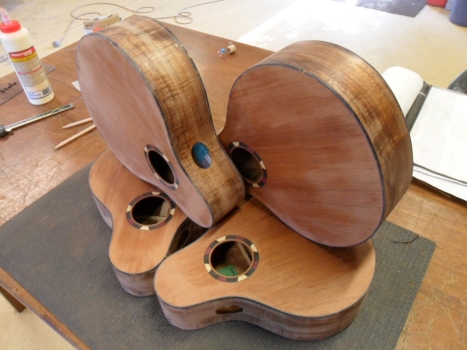
I’ve just finished making and fitting the tortoise shell celluloid binding to the 4 tenor ukuleles that I’m building and thought I’d give a quick rundown on the process. I really like the look of tortoise shell binding but appreciate it’s not to everybody’s taste. I think the swirling yellow and brown colours complement any body and soundboard timber combination. I also like its durability and the fact that I can cold bend it as I glue it down. I like to border the tortoise celluloid binding with a black and white line on the face visible from the top and the side of the uke and the process below explains how I go about making the binding and fitting it to the rebate around the body.
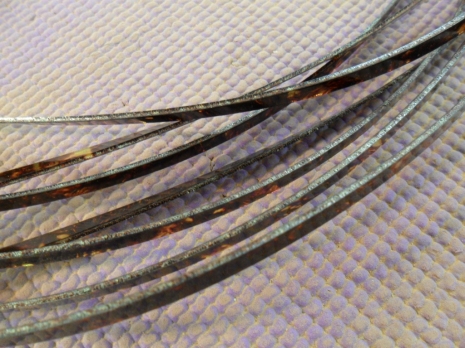
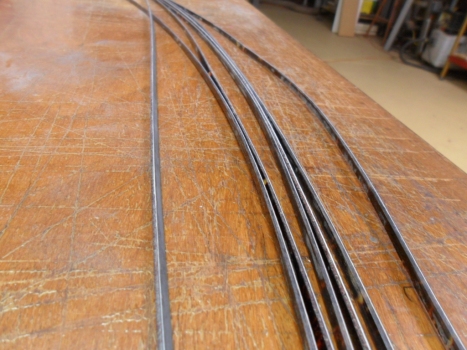
But first a word about the materials. I get the tortoise celluloid binding from eBay. I use the 6mm x 1.5mm stuff that comes in a 1.5mtr length. To accentuate the semi-transparency and the swirling colours, I glue a layer of white vulcanised paper (sold as”fibre veneer”) to the back of the celluloid. Then to create a subtle shadow line behind the white paper, I glue on a layer of black vulcanised paper. This paper is a strange material that is sort of half way between paper and plastic and is very similar to gasket paper to those of a mechanical bent. I get it from LMI and use the 0.25mm thick paper.
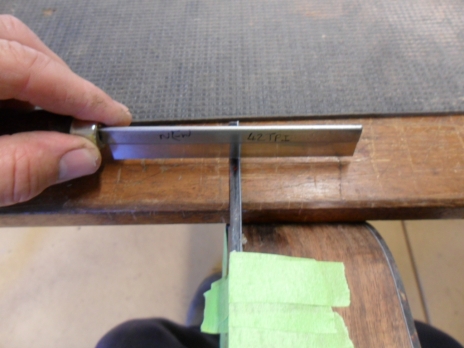
And second, a word about the tools. The binding is glued into a rebate that is cut around the front and back edge of the body. The cutting of that rebate can be as complicated an operation as you chose to make it and me being me I made a very complicated and sophisticated tool. Details of its design and operation are here binding rebate cutter. Other than that I use a custom made straight edge to dress a square edge on the binding strips and a length of polyethylene bar to help glue the binding to the paper. I use craft knives to cut the paper and cabinet scrapers to clean up the binding after it is glued onto the body.
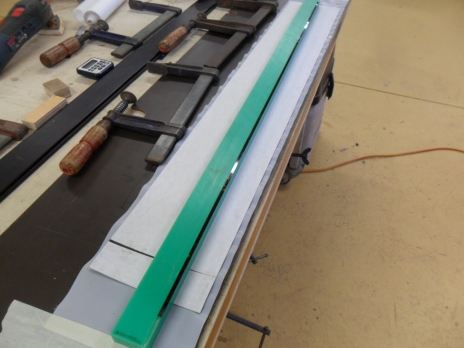
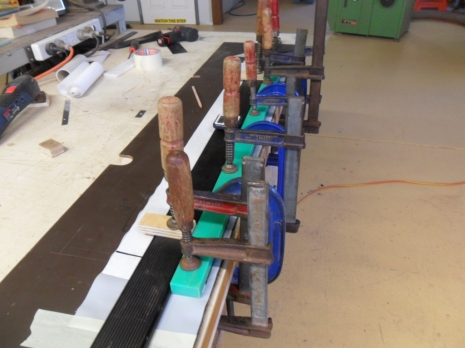
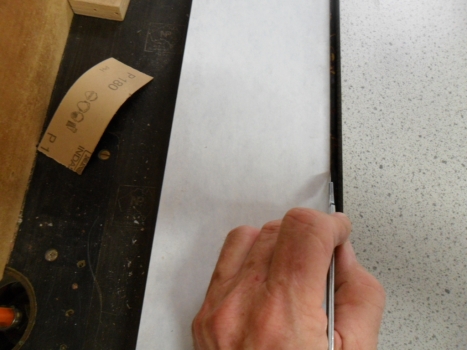
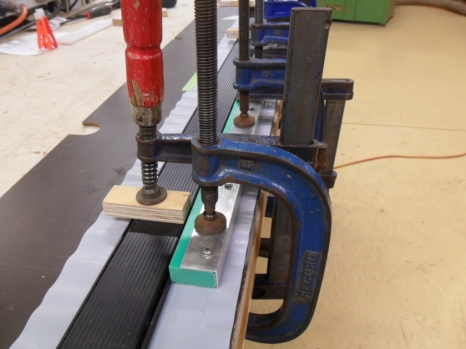
First job is to work out how long the binding needs to be to go around the circumference of the soundboard in one piece. Easy, just wrap the binding around the body, add 25mm and cut the 8 pieces to length (I’m binding the sound board and back panel.) I then cut the sheets of the 0.25mm black and white vulcanised paper to the same length and glue them to each other with super glue (cyanoacrylate). I do this between a couple of sheets of melamine faced chip board with a plastic separation barrier and the use of lots of clamps. The tortoise celluloid comes with rough guillotined edges, one of which needs to be dressed up to make it straight and flat to make a good glue joint with the paper. I made a sort of straight edge jig out of phenolic resin sheet that supports the tortoise celluloid while I dress an edge on it at the router table using a bearing copy bit
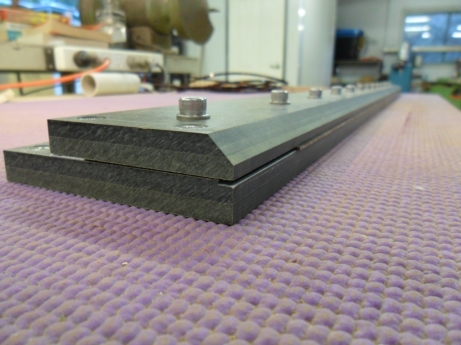
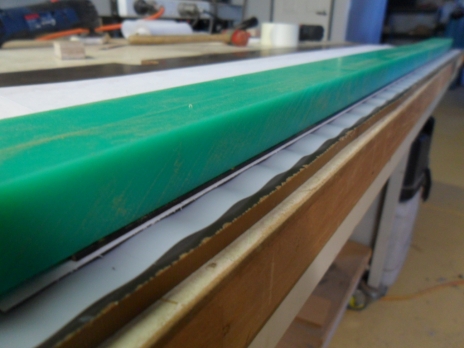
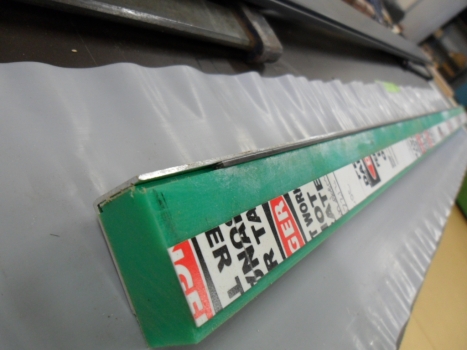
I was lucky to come across some lengths of 20 x 40mm polyethylene rectangular bar which I made into a jig to hold the celluloid straight while it is being glued onto the white paper backing. I use superglue for this as well and the glues reluctance to stick to the polyethylene jig is a big help. The first picture of this steps shows the binding held into a little rebate along the edge of the green polyethylene block with double sided tape. The celluloid is still a bit curly and unmanageable until it get glued to something else and the tape holds it still while the jig is positioner over the vulcanised paper. So the process is, glue down a wide face, separate it from the rest of the paper sheet with a craft knife, glue down a thin edge, separate with a craft knife – repeat. I leave the superglue to dry for about for 2 hours so the whole process to cover a wide and a narrow edge of 8 lengths of binding drags on.
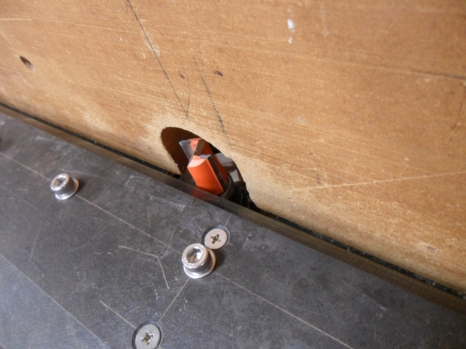
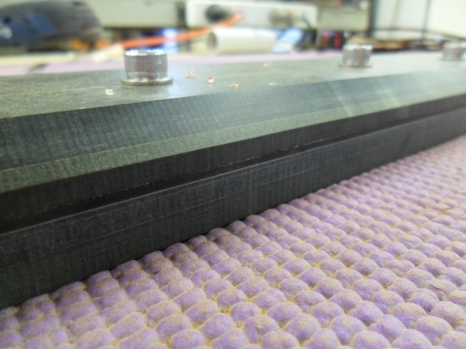
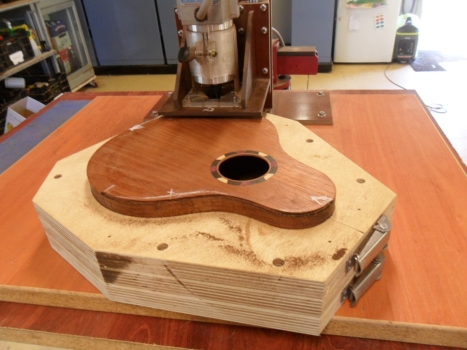
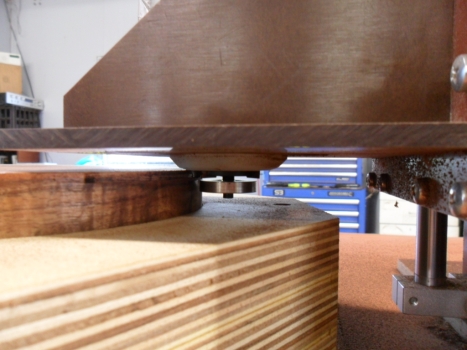
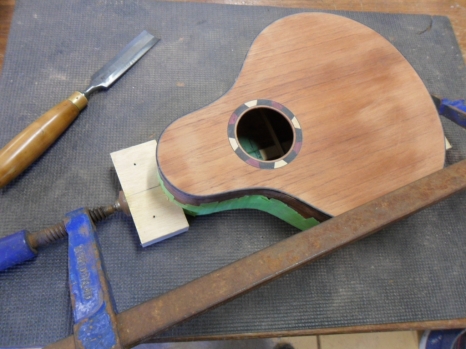
The next step is to cut the rebates around the sound boards and backs of the 4 bodies. Follow the link above to a detailed description of the floating router binding rebate cutter if you want to completely understand what is going on in this step. For bodies this deep I cut the rebates 4mm deep. Next is the simple step of gluing the binding into the rebate. I use Titebond Original for this and lots and lots of tape. I should have mentioned earlier that a liberal coating of a shellac / metho solution over all surfaces prior to cutting the rebates helps in a number of ways. It is thought that it helps reduce tearout of the soft soundboard wood while cutting the rebate, it stops the very sticky masking tape from pulling out big wood fibres when it is eventually peeled away and it stops the glue squeeze out from soaking and discolouring the timber. It probably also help stop the plastic sanding and scraping dust from getting into the grain of the timber thus keeping it cleaner. Wipe it on and let it dry before cutting the rebate and the steps that follow are a little bit easier.
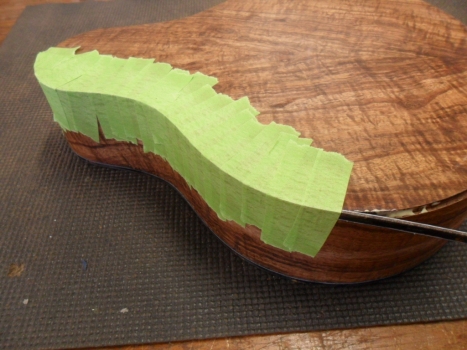
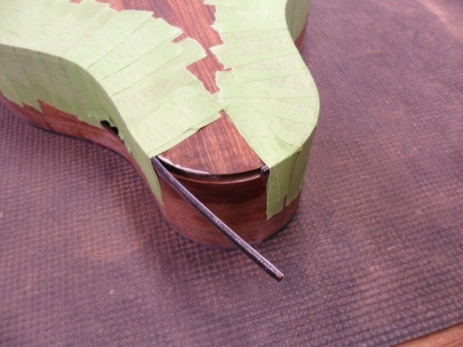
To glue down the binding I start by squaring up one end of the binding with a trim saw and chisel. Then starting at the neck joint centre line, I brush glue into the rebate for about 1/4 of the circumference. I align the tidy end of the binding with the centre line and start securely pulling it into place with the tape. I prepare for this step by pre tearing lots of the bits of tape and sticking them along the edge of my desk. Working as quickly as I can I use one hand to push the binding into the rebate while the other hand applies the tape. When I have worked my way around to where the glue runs out I apply more glue to the next ¼. When I am about 50 mm short of getting back to the neck joint and before I apply glue to that last little bit of rebate I bend the binding over the end that I started from and mark the length that needs trimming with a knife. I then cut off the overhang with a trim saw and carefully pare back the excess with a sharp chisel until the length is correct for a tidy joint. I then brush glue into the last bit of the rebate and tape the binding down. To make sure that the ends of the binding are snug I made a pair of curved cawls to help clamp it down.
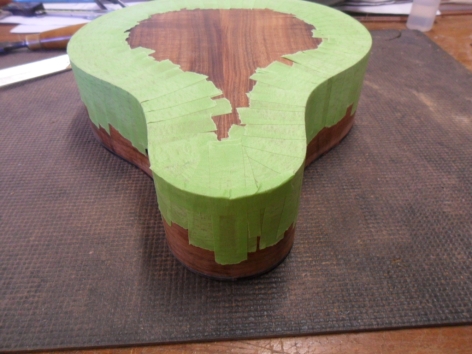
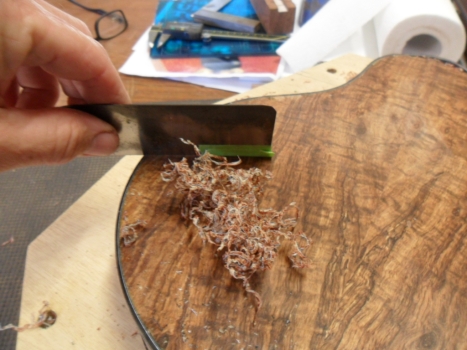
The final stage is probably my favourite little job in the whole uke making process, scraping binding flush. I find the sharpening and use of cabinet scrapers very satisfying and love the way that a scraper slicers away little curly shavings from the 1mm overhang. Using a scraper for this job is a delight but using abrasive is a pain as the material clogs the paper. Almost all of the overhang and glue squeeze out comes off with the scraper and it only needs a little bit of attention with sandpaper wrapped around a block to finish the job.
Next, neck construction.

You must be logged in to post a comment.